
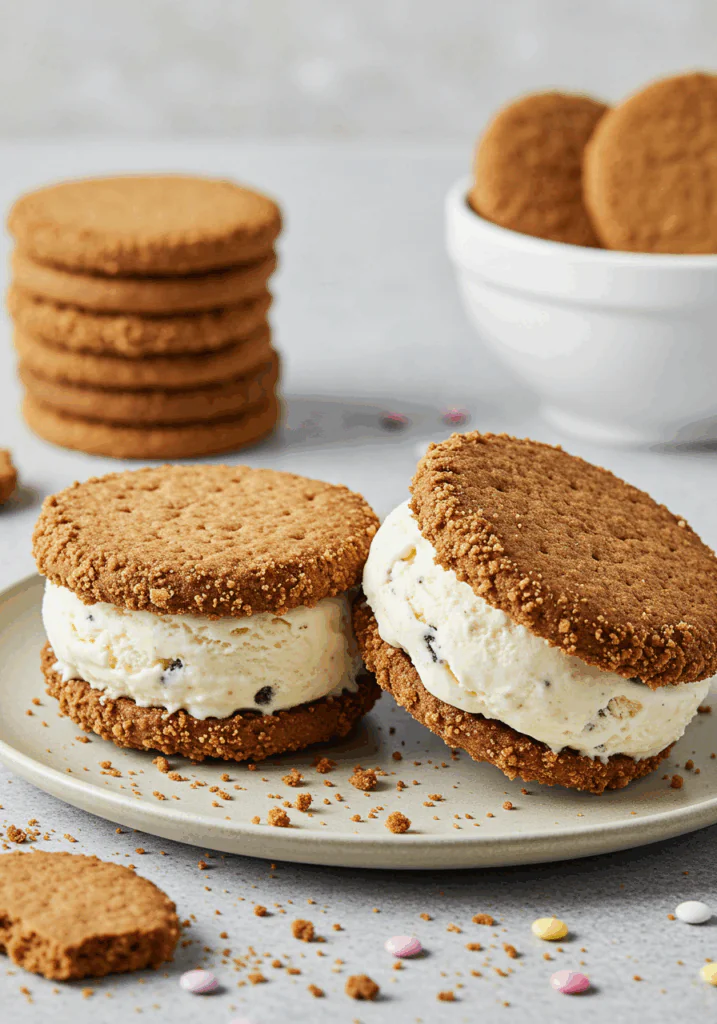
These Biscoff Ice Cream Sandwiches are the perfect way to enjoy the delicious combination of crunchy, spiced cookies and rich, creamy ice cream. With the warm, caramelized flavor of Biscoff cookies paired with your favorite ice cream, these sandwiches are a treat everyone will love. Best of all, they’re super easy to make and perfect for summer parties or a sweet, frozen snack!
Subscribe to our newsletter for more easy and indulgent dessert recipes delivered right to your inbox!
Why You’ll Love These Biscoff Ice Cream Sandwiches
- Crunchy and creamy: The Biscoff cookies add a delightful crunch that pairs perfectly with smooth, creamy ice cream.
- Customizable: You can fill these sandwiches with any flavor of ice cream you love—vanilla, chocolate, or something fruity!
- No bake: It’s an easy, no-bake dessert that’s quick to assemble.
- Great for summer: Perfect for hot days when you want a cool, refreshing treat.
Ingredients for Biscoff Ice Cream Sandwiches
- 20 Biscoff cookies (or any speculoos cookies)
- 2 cups vanilla ice cream (or any flavor you prefer)
- 2 tablespoons melted Biscoff spread (optional, for extra flavor)
- A pinch of sea salt (optional, for garnish)
Tools You’ll Need:
- Baking sheet or tray
- Parchment paper
- Ice cream scoop
- Butter knife or spatula
How to Make Biscoff Ice Cream Sandwiches
Step 1: Prepare the Cookies
- Lay out the Biscoff cookies on a baking sheet or tray, making sure they are evenly spaced.
- If you like, you can slightly warm the Biscoff spread in the microwave for a few seconds to make it easier to spread. Drizzle or spread a small amount of the Biscoff spread on the flat side of each cookie for added flavor.
Step 2: Scoop the Ice Cream
- Let your ice cream soften for about 5-10 minutes at room temperature so it’s easier to scoop and spread.
- Using an ice cream scoop, scoop a generous portion of ice cream onto the flat side of one cookie. You want to use enough ice cream to cover most of the cookie but not too much to make it spill over.
Step 3: Assemble the Sandwiches
- Top each cookie with another Biscoff cookie to form a sandwich. Gently press them together to make sure the ice cream sticks and the sandwich holds its shape.
- If you like, you can roll the edges of the ice cream sandwiches in mini chocolate chips, crushed Biscoff crumbs, or any other toppings you enjoy.
Step 4: Freeze the Sandwiches
- Place the assembled ice cream sandwiches back on the baking sheet or tray, and freeze them for at least 2 hours, or until the ice cream has firmed up and the sandwiches are fully set.
Step 5: Serve
- Once the ice cream sandwiches are frozen and firm, serve them immediately or store them in an airtight container in the freezer until ready to enjoy.
- For an extra touch, sprinkle a pinch of sea salt on top for a sweet-salty contrast!
Serving Suggestions
- Serve the sandwiches with extra toppings like melted chocolate or a drizzle of caramel for added indulgence.
- Pair with a cold glass of milk or iced coffee for the ultimate treat!
Tips for the Best Biscoff Ice Cream Sandwiches
- If you want a quicker freezing time, roll the assembled sandwiches in crushed Biscoff cookies or mini chocolate chips so the ice cream doesn’t melt too much while freezing.
- Try mixing in a spoonful of Biscoff spread into the ice cream for a swirled, caramelized flavor throughout.
- Make sure your ice cream is slightly softened for easier scooping, but not too melted.
Storage and Reheating Instructions
- Store any leftover ice cream sandwiches in an airtight container in the freezer for up to 1 month.
- No need to reheat, as these sandwiches are meant to be served straight from the freezer.
Frequently Asked Questions (FAQ)
Can I use a different type of cookie?
Yes! You can use any other cookies you love, such as chocolate chip cookies, graham crackers, or even oatmeal cookies.
How can I make these sandwiches dairy-free?
Simply substitute the regular ice cream for a dairy-free version, such as coconut milk ice cream, almond milk ice cream, or sorbet for a lighter option.
Can I use store-bought Biscoff spread?
Yes! You can use store-bought Biscoff spread for an easy and quick addition to your sandwiches, or omit it if you prefer a simpler version.
Conclusion: A Crunchy, Creamy Delight
These Biscoff Ice Cream Sandwiches are the perfect treat for anyone who loves the sweet, caramelized flavor of Biscoff cookies. With just a few simple ingredients, you can create a decadent dessert that’s sure to impress at any gathering or serve as a satisfying after-dinner indulgence.
Preparation Time: 10 minutes
Freezing Time: 2 hours
Cuisine: Dessert, Frozen Treats
Nutritional Information (per sandwich)
Calories: 300
Protein: 3g
Carbohydrates: 32g
Fat: 18g
Fiber: 2g
Enjoy every crunchy, creamy bite of these Biscoff Ice Cream Sandwiches!
Print
Biscoff Ice Cream Sandwiches
- Total Time: 2 hours 10 minutes
Description
These Biscoff Ice Cream Sandwiches are the perfect way to enjoy the delicious combination of crunchy, spiced cookies and rich, creamy ice cream. With the warm, caramelized flavor of Biscoff cookies paired with your favorite ice cream, these sandwiches are a treat everyone will love. Best of all, they’re super easy to make and perfect for summer parties or a sweet, frozen snack!
Subscribe to our newsletter for more easy and indulgent dessert recipes delivered right to your inbox!
Ingredients
- 20 Biscoff cookies (or any speculoos cookies)
- 2 cups vanilla ice cream (or any flavor you prefer)
- 2 tablespoons melted Biscoff spread (optional, for extra flavor)
- A pinch of sea salt (optional, for garnish)
Instructions
Step 1: Prepare the Cookies
- Lay out the Biscoff cookies on a baking sheet or tray, making sure they are evenly spaced.
- If you like, you can slightly warm the Biscoff spread in the microwave for a few seconds to make it easier to spread. Drizzle or spread a small amount of the Biscoff spread on the flat side of each cookie for added flavor.
Step 2: Scoop the Ice Cream
- Let your ice cream soften for about 5-10 minutes at room temperature so it’s easier to scoop and spread.
- Using an ice cream scoop, scoop a generous portion of ice cream onto the flat side of one cookie. You want to use enough ice cream to cover most of the cookie but not too much to make it spill over.
Step 3: Assemble the Sandwiches
- Top each cookie with another Biscoff cookie to form a sandwich. Gently press them together to make sure the ice cream sticks and the sandwich holds its shape.
- If you like, you can roll the edges of the ice cream sandwiches in mini chocolate chips, crushed Biscoff crumbs, or any other toppings you enjoy.
Step 4: Freeze the Sandwiches
- Place the assembled ice cream sandwiches back on the baking sheet or tray, and freeze them for at least 2 hours, or until the ice cream has firmed up and the sandwiches are fully set.
Step 5: Serve
- Once the ice cream sandwiches are frozen and firm, serve them immediately or store them in an airtight container in the freezer until ready to enjoy.
- For an extra touch, sprinkle a pinch of sea salt on top for a sweet-salty contrast!
Notes
- If you want a quicker freezing time, roll the assembled sandwiches in crushed Biscoff cookies or mini chocolate chips so the ice cream doesn’t melt too much while freezing.
- Try mixing in a spoonful of Biscoff spread into the ice cream for a swirled, caramelized flavor throughout.
- Make sure your ice cream is slightly softened for easier scooping, but not too melted.
- Prep Time: 10 minutes
- Freezing Time: 2 hours
- Cuisine: Dessert, Frozen Treats