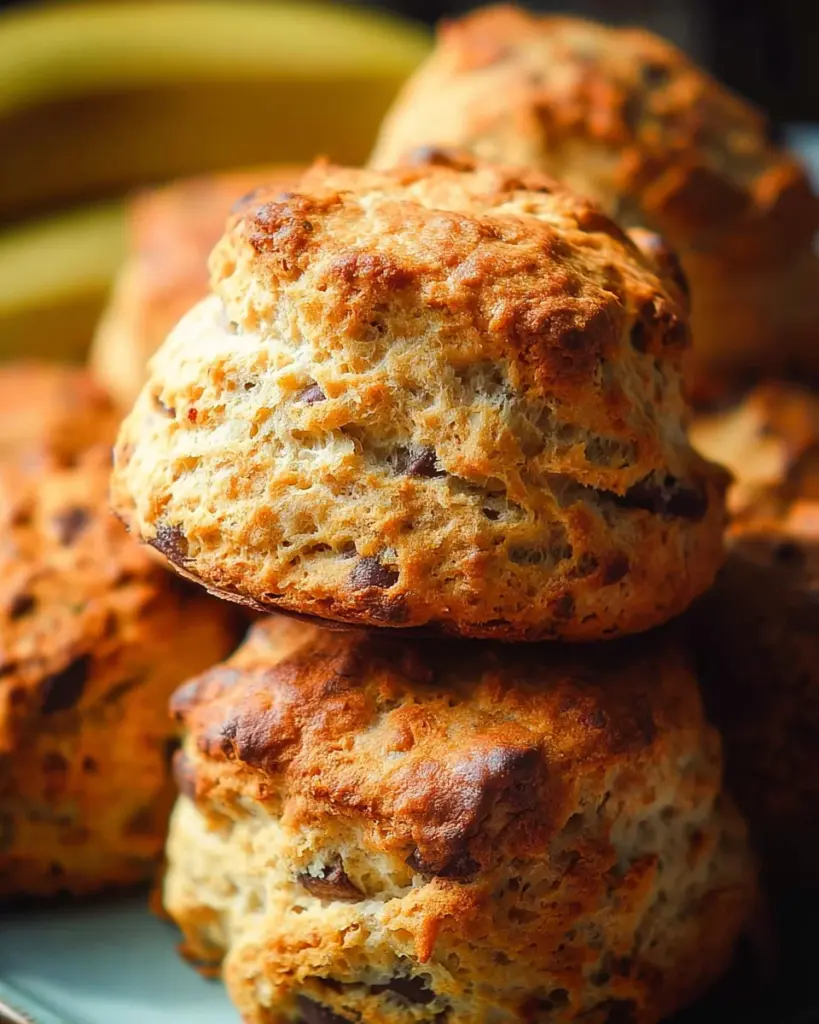
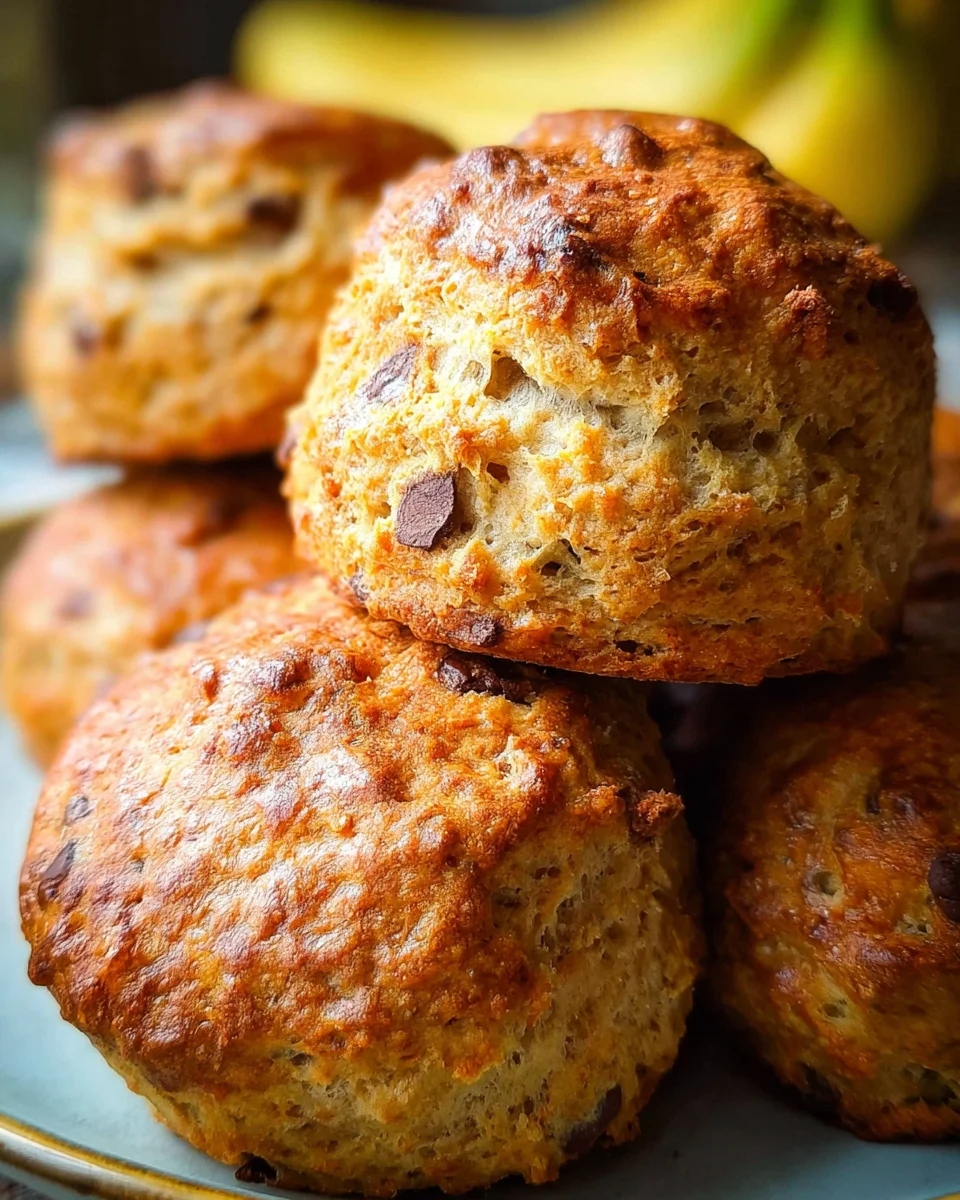
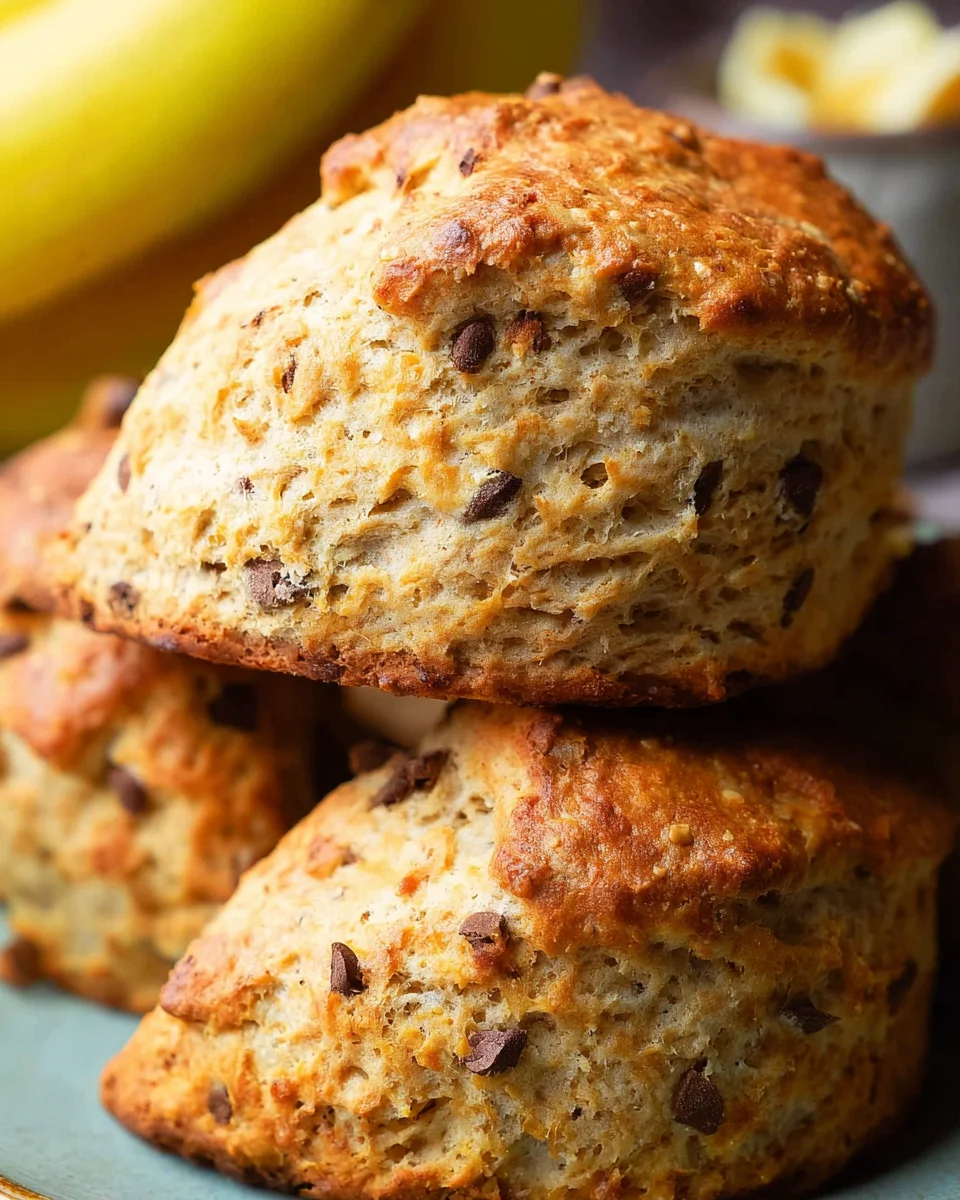
These Banana Scones are a delightful treat perfect for breakfast or a snack. Made with just three simple ingredients, they come together in less than 30 minutes. The unique combination of mashed bananas and plant-based yogurt makes these scones incredibly moist and flavorful. Whether you’re hosting a brunch or looking for a quick bite during the day, these scones are versatile enough to suit all occasions. Plus, you can easily customize them by adding nuts, chocolate chips, or drizzling with a maple glaze for an extra touch.
Why You’ll Love This Recipe
- Quick and Easy: With only three main ingredients, you can whip up these scones in no time.
- Customizable: Add your favorite mix-ins like nuts or chocolate chips to make them your own.
- Vegan-Friendly: These scones are completely plant-based, making them suitable for vegan diets.
- Healthy Twist: Use ripe bananas to naturally sweeten the scones without added sugars.
- Perfect for Any Occasion: Enjoy them fresh from the oven for breakfast or as a delightful afternoon snack.
Tools and Preparation
To ensure your baking experience is seamless, having the right tools is essential. A few kitchen essentials will make the process smoother and help achieve the best results.
Essential Kitchen Tools
- Mixing bowl
- Fork or stand mixer
- Measuring cups
- Cookie cutter (5 cm)
- Baking sheet
- Parchment paper
Why These Tools Matter
- Mixing Bowl: A large bowl allows you to mix all ingredients easily without spilling.
- Fork or Stand Mixer: This helps mash bananas thoroughly and combines ingredients efficiently.
- Cookie Cutter: Ensures uniform scone sizes for even baking.
- Parchment Paper: Prevents sticking and makes cleanup a breeze.
Ingredients
These Banana Scones are easy 3-ingredient vegan banana bread scones. They are easy to make in less than 30 minutes, oil-free, and easy to customize by adding nuts, maple glaze, or chocolate chips.
- 3 1/2 cups Self-Rising Flour (+ 1/4 cup to work the dough)
- 1 1/3 cup Mashed Banana (a bit less than 3 large bananas)
- 2/3 cup Vanilla Plant-Based Yogurt (+ a bit more to brush on top of the scones)
- 1/2 cup Dairy-Free Dark Chocolate Chips (or chopped pecans, walnuts)
- 1 teaspoon Cinnamon
- 1/4 cup Unrefined Sugar
How to Make Banana Scones
Step 1: Preheat the Oven
Preheat your oven to 390°F (200°C). Line a large baking sheet with parchment paper and lightly oil it with cooking spray. Set it aside for later use.
Step 2: Mash the Bananas
In a large mixing bowl, add the bananas and mash them using a fork or the paddle attachment of your stand mixer until smooth.
Step 3: Measure Your Ingredients
Pack the mashed banana into a measuring cup until you have approximately 1 cup + 1/3 cup of mashed banana.
Step 4: Combine Ingredients
Return the mashed banana to the mixing bowl. Add in the yogurt and self-rising flour. If using optional ingredients, add cinnamon and sugar at this stage.
Step 5: Form the Dough
Stir initially with a spoon before switching to kneading with floured hands or using your stand mixer’s paddle attachment. The dough will be sticky but should come together after some kneading.
Step 6: Add Mix-ins
If you are including chocolate chips or nuts, fold them into the dough now until evenly distributed.
Step 7: Prepare for Cutting
Clean your hands if they are too messy. Lightly oil them with olive oil to prevent sticking. Oil your cookie cutter as well.
Step 8: Shape The Dough
Sprinkle about two tablespoons of flour on your work surface. Place the dough on it and flatten it into about a 0.8-inch thickness using your hands or a rolling pin.
Step 9: Cut Out Scones
Use your cookie cutter to cut out pieces of dough from flattened sections.
Step 10: Arrange on Baking Sheet
Transfer cut-out scones onto your prepared baking sheet, leaving some space between each one as they will expand during baking.
Step 11: Reuse Leftover Dough
Gather leftover dough scraps, press them together gently, roll out again, and cut additional scones.
Step 12: Brush with Yogurt
Using a pastry brush, apply yogurt on top of each scone before placing them in the oven.
Step 13: Bake
Bake on the center rack of your preheated oven for about 15 to 17 minutes until they turn golden brown on top.
Step 14: Cool Down
Let the baked scones cool on a cooling rack before serving warm or at room temperature.
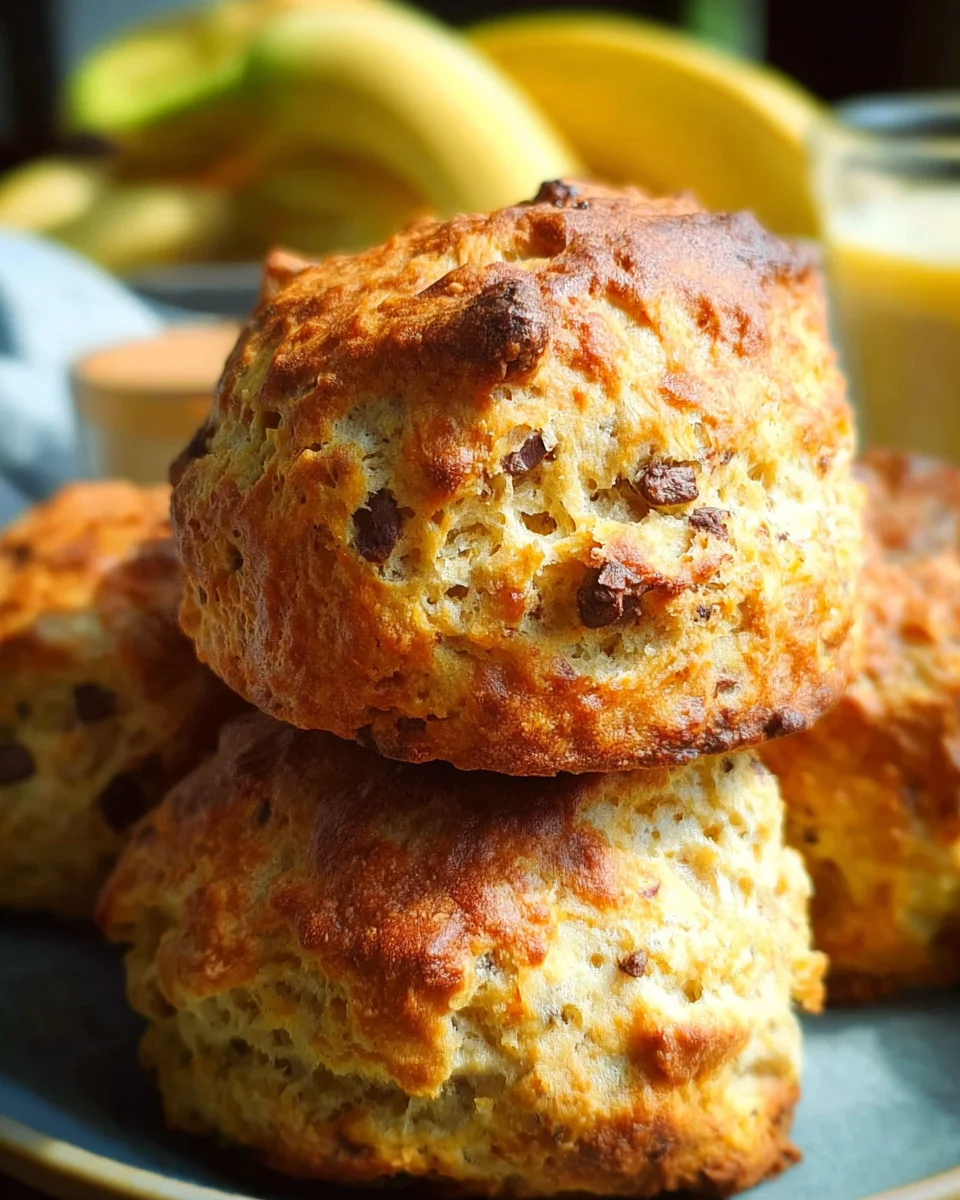
How to Serve Banana Scones
Banana scones are a delightful treat that can be enjoyed in various ways. Whether for breakfast, a snack, or dessert, these scones are versatile and can be paired with many accompaniments.
With Fresh Fruit
- Berries: Serve the scones with fresh strawberries, blueberries, or raspberries for a refreshing contrast.
- Banana Slices: Enhance the banana flavor by topping your scones with sliced bananas.
With Spreads
- Nut Butter: Spread almond or peanut butter on warm scones for added richness and protein.
- Vegan Cream Cheese: A smooth layer of vegan cream cheese adds a creamy texture that complements the scone’s flavor.
With Beverages
- Herbal Tea: Pair your scones with a warm cup of herbal tea for a cozy afternoon snack.
- Coconut Milk Latte: Enjoy these scones alongside a frothy coconut milk latte for a delicious coffee break.
Drizzled with Maple Syrup
- Maple Syrup: Drizzle warm maple syrup over the scones for an extra touch of sweetness.
How to Perfect Banana Scones
To ensure your banana scones turn out perfectly every time, follow these helpful tips.
- Boldly Measure Ingredients: Make sure to measure self-rising flour accurately; too much or too little can affect texture.
- Boldly Use Ripe Bananas: The riper the bananas, the sweeter and more flavorful your scones will be. Look for bananas with brown spots.
- Boldly Knead the Dough: Don’t be afraid to knead the dough well; this helps develop the right texture for fluffy scones.
- Boldly Preheat Your Oven: Make sure your oven is fully preheated before baking to achieve an even rise and golden color.
- Boldly Customize Add-ins: Feel free to add nuts or dairy-free chocolate chips according to your taste preferences for unique flavors.
- Boldly Cool Completely Before Serving: Let the scones cool on a rack before serving to enhance their texture and taste.
Best Side Dishes for Banana Scones
Banana scones pair wonderfully with various side dishes. Here are some suggestions that complement their flavors beautifully.
- Fresh Fruit Salad: A mix of seasonal fruits adds freshness and balances the sweetness of the scones.
- Yogurt Parfait: Layer plant-based yogurt with granola and fruits for a nutritious side that works well with breakfast or brunch.
- Chia Seed Pudding: This creamy pudding made from chia seeds and dairy-free milk offers a delightful texture contrast.
- Granola Bars: Crunchy homemade granola bars can provide an extra energy boost when served alongside.
- Smoothie Bowl: A smoothie bowl topped with fresh fruit, nuts, and seeds makes for a refreshing pairing.
- Oatmeal Cookies: Serve alongside soft oatmeal cookies for a comforting treat at any time of day.
Common Mistakes to Avoid
Making Banana Scones can be simple, but some common mistakes can affect the final product. Here are a few to keep in mind.
- Using Overripe Bananas: While ripe bananas are great for mashing, overly ripe ones can make the scones too sweet and mushy. Aim for bananas that are ripe but still firm.
- Not Measuring Ingredients Accurately: Precision is key in baking. Use measuring cups and spoons to ensure you have the right amounts of flour and other ingredients.
- Skipping the Yogurt: The yogurt adds moisture and flavor. Skipping it will result in dry scones. Always include it for the best texture.
- Overworking the Dough: Kneading too much can make the scones tough rather than light and fluffy. Mix just until combined for best results.
- Ignoring Oven Temperature: Baking at the wrong temperature can lead to uneven cooking. Always preheat your oven and use an oven thermometer if necessary.
Refrigerator Storage
- Store leftover Banana Scones in an airtight container.
- They will last up to 3 days in the refrigerator.
- Place parchment paper between layers to prevent sticking.
Freezing Banana Scones
- Wrap each scone individually in plastic wrap before placing them in a freezer-safe bag.
- They can be frozen for up to 3 months.
- Label the bag with the date for easy tracking.
Reheating Banana Scones
- Oven: Preheat to 350°F (175°C) and bake for about 5-10 minutes until warm. This helps restore their original texture.
- Microwave: Heat one scone on a microwave-safe plate for about 15-20 seconds. Be cautious not to overheat, as this can make them tough.
- Stovetop: Place on a non-stick skillet over low heat for a few minutes, flipping occasionally until warmed through.
Frequently Asked Questions
What makes these Banana Scones vegan?
These Banana Scones are made without any animal products. The recipe uses plant-based yogurt instead of dairy, making it suitable for vegan diets.
Can I add different flavors or ingredients to my Banana Scones?
Absolutely! You can customize your Banana Scones by adding nuts, chocolate chips, or even spices like nutmeg for extra flavor.
How do I know when my Banana Scones are done baking?
Look for a golden-brown top and a firm texture when lightly pressed. A toothpick inserted into the center should come out clean.
Can I double this Banana Scone recipe?
Yes, you can double the ingredients easily if you need more servings. Just ensure your mixing bowl is large enough to handle the increased volume.
Conclusion
These Banana Scones are not only quick and easy to prepare but also incredibly versatile. With just three main ingredients, you can whip them up in under 30 minutes! Feel free to customize with your favorite add-ins like nuts or chocolate chips for a personal touch that everyone will love.

Banana Scones
- Total Time: 27 minutes
- Yield: Approximately 12 servings 1x
Description
Indulge in the delightful experience of fresh Banana Scones that blend simplicity and flavor beautifully. Made with only three key ingredients, these moist scones come together in under 30 minutes, making them perfect for a quick breakfast or an afternoon snack. The combination of ripe bananas and plant-based yogurt creates a rich texture, while the addition of nuts or dairy-free chocolate chips elevates them to a new level of deliciousness. Serve them warm, drizzled with maple syrup or alongside fresh fruit, for a versatile treat that suits any occasion.
Ingredients
- 3 1/2 cups self-rising flour (+ 1/4 cup for dusting)
- 1 1/3 cups mashed banana (approximately 3 large bananas)
- 2/3 cup vanilla plant-based yogurt
- 1/2 cup dairy-free dark chocolate chips or chopped nuts
- 1 teaspoon cinnamon
- 1/4 cup unrefined sugar
Instructions
- Preheat your oven to 390°F (200°C) and line a baking sheet with parchment paper.
- In a mixing bowl, mash the bananas until smooth.
- Add the yogurt and self-rising flour to the mashed bananas.
- Mix in cinnamon and sugar if desired.
- Stir until combined; knead gently until dough forms.
- Fold in chocolate chips or nuts.
- Roll out the dough to about 0.8 inches thick and cut into shapes using a cookie cutter.
- Place on the prepared baking sheet, brush with additional yogurt, and bake for 15-17 minutes until golden.
- Prep Time: 10 minutes
- Cook Time: 17 minutes
- Category: Breakfast & Brunch
- Method: Baking
- Cuisine: Vegan
Nutrition
- Serving Size: 1 scone (50g)
- Calories: 170
- Sugar: 6g
- Sodium: 150mg
- Fat: 2g
- Saturated Fat: 0g
- Unsaturated Fat: 1g
- Trans Fat: 0g
- Carbohydrates: 34g
- Fiber: 2g
- Protein: 3g
- Cholesterol: 0mg