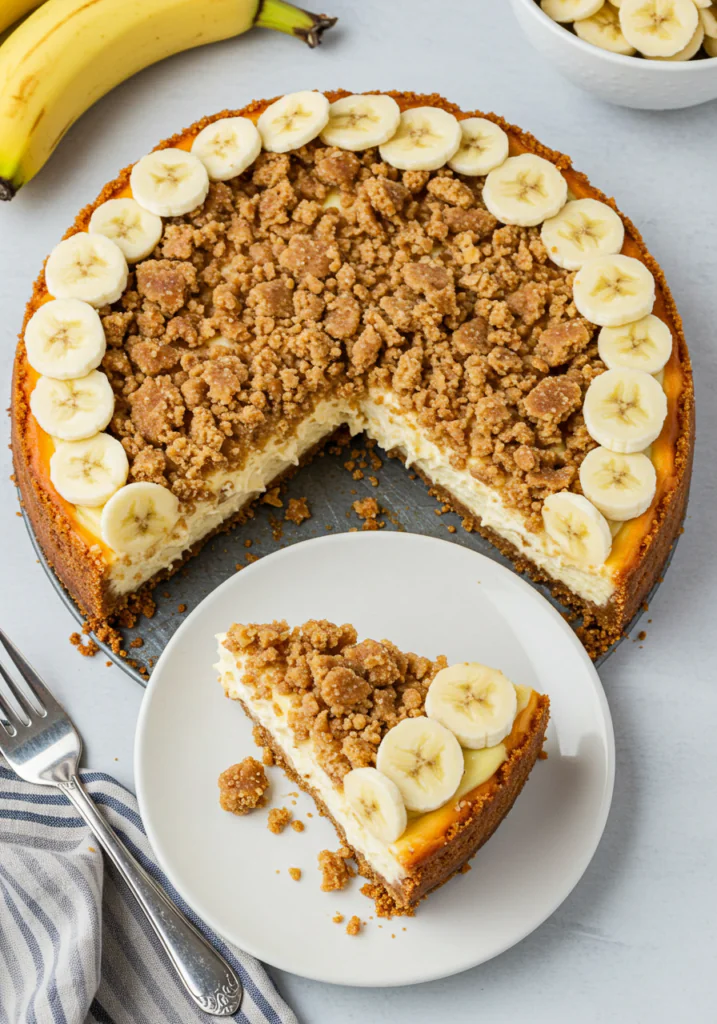
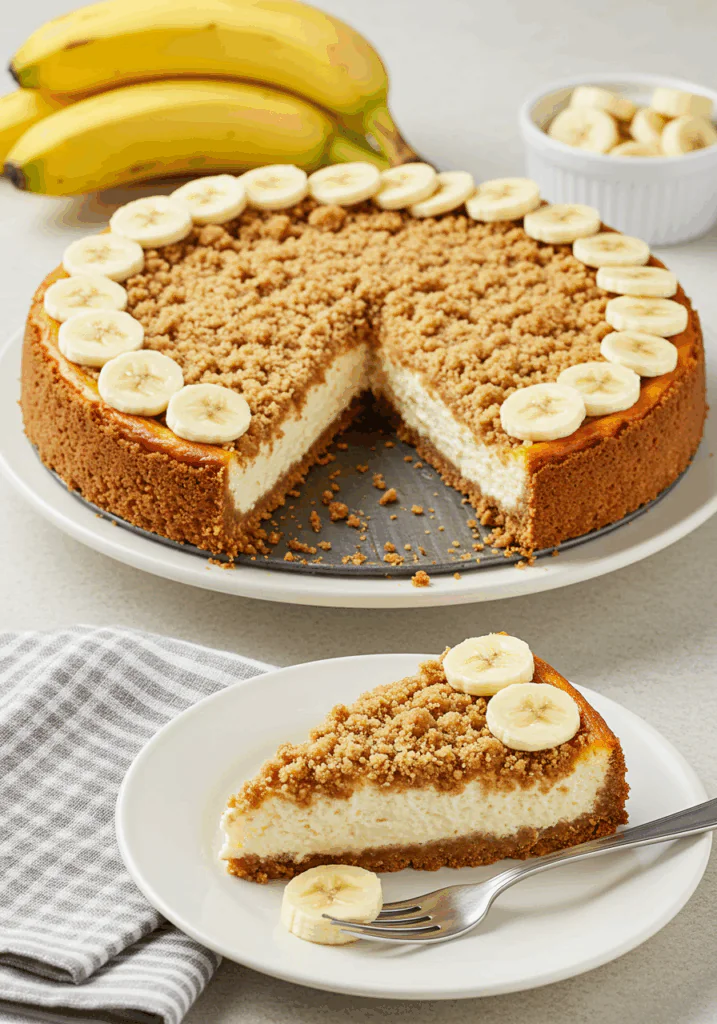
Get ready to fall in love with this Banana Pudding Crunch Cheesecake! It’s the ultimate dessert mashup: creamy banana cheesecake layered over a buttery vanilla wafer crust, topped with crunchy banana pudding topping, and finished with fluffy whipped cream. Every bite is rich, dreamy, and packed with nostalgic banana pudding flavors.
Want recipes like this delivered straight to your inbox? Subscribe now to get the latest culinary creations you’ll love.
Why You’ll Love This Recipe
- Two Classics in One – Cheesecake and banana pudding combined.
- Creamy and Crunchy – A smooth cheesecake filling with a crunchy topping.
- Perfect for Any Occasion – Great for birthdays, holidays, or potlucks.
- Make-Ahead Friendly – Prepare it a day in advance for stress-free entertaining.
- Show-Stopping Dessert – Gorgeous presentation and unbeatable flavor.
Ingredients You’ll Need
For the Crust:
- 2 cups crushed vanilla wafers
- ¼ cup granulated sugar
- ½ cup unsalted butter, melted
For the Cheesecake Filling:
- 24 oz cream cheese, softened
- 1 cup granulated sugar
- 3 large eggs
- 1 cup mashed ripe bananas (about 2 medium bananas)
- 1 tsp vanilla extract
- 1 cup sour cream
- 2 tbsp all-purpose flour
For the Banana Pudding Crunch Topping:
- 1 cup crushed vanilla wafers
- ½ cup chopped pecans (optional)
- 2 tbsp unsalted butter, melted
- ½ box (about 3 oz) instant banana pudding mix (dry, not prepared)
For Garnish:
- Whipped cream
- Extra vanilla wafers
- Banana slices (add just before serving)
Tools You’ll Need
- 9-inch springform pan
- Mixing bowls
- Electric mixer or stand mixer
- Baking sheet
- Parchment paper
Step-by-Step Instructions
Step 1: Prepare the Crust
Preheat your oven to 325°F (165°C).
In a bowl, mix crushed vanilla wafers, granulated sugar, and melted butter until combined.
Press the mixture firmly into the bottom of a greased 9-inch springform pan.
Bake for 8-10 minutes. Let cool slightly.
Step 2: Make the Cheesecake Filling
In a large bowl, beat the cream cheese and sugar until smooth and creamy.
Add the eggs one at a time, beating well after each addition.
Mix in the mashed bananas, vanilla extract, and sour cream.
Add the flour and beat until just combined — don’t overmix.
Step 3: Bake the Cheesecake
Pour the cheesecake batter over the cooled crust.
Bake for 55-65 minutes, or until the center is set but still slightly jiggly.
Turn off the oven, crack the door open, and let the cheesecake cool inside for 1 hour.
Step 4: Chill the Cheesecake
Remove the cheesecake from the oven and refrigerate for at least 4 hours, preferably overnight.
Step 5: Make the Banana Pudding Crunch Topping
Preheat the oven to 350°F (175°C).
In a bowl, combine crushed vanilla wafers, chopped pecans (if using), melted butter, and dry banana pudding mix.
Spread the mixture on a parchment-lined baking sheet.
Bake for 8-10 minutes, stirring halfway through, until golden and crunchy.
Let cool completely.
Step 6: Assemble and Serve
Sprinkle the banana pudding crunch generously over the chilled cheesecake.
Pipe or dollop whipped cream around the edges.
Garnish with extra vanilla wafers and banana slices right before serving.
Tips for Perfect Banana Pudding Crunch Cheesecake
- Use Room Temperature Ingredients – Ensures a smooth, lump-free batter.
- Don’t Overbake – Cheesecake should still have a slight jiggle in the center when done.
- Cool Gradually – Prevents cracks in the cheesecake.
- Add Bananas Last – Banana slices can brown quickly; add them just before serving.
- Keep Crunch Separate – Store the banana crunch topping separately if making ahead to keep it crisp.
Serving Suggestions
- Coffee or Iced Latte – Perfect pairing with the creamy, sweet flavors.
- Fresh Berries – A light, fruity side complements the rich cheesecake.
- Chocolate Drizzle – For an extra indulgent twist.
- Party Favorite – Bring to potlucks, baby showers, or family gatherings.
How to Store & Freeze
Storing:
- Store cheesecake covered in the refrigerator for up to 4 days.
- Keep topping separate if storing for more than a day to preserve crunch.
Freezing:
- Freeze the plain cheesecake (without topping or bananas) tightly wrapped for up to 2 months.
- Thaw overnight in the refrigerator before adding the crunch topping and garnishes.
Frequently Asked Questions
1. Can I use store-bought banana pudding instead of dry mix?
No, the dry banana pudding mix is essential for the crunch topping texture.
2. Can I skip the pecans in the topping?
Absolutely! The topping will still be delicious without them.
3. How do I know when the cheesecake is done?
It should be set around the edges and slightly jiggly in the center.
4. Can I use a different crust?
Yes! Graham cracker crust or crushed shortbread cookies would work well too.
5. What if I don’t have a springform pan?
You can use a deep 9-inch round cake pan, but make sure to line it well with parchment for easy removal.
Final Thoughts
This Banana Pudding Crunch Cheesecake combines everything you love about classic banana pudding and rich, creamy cheesecake in one irresistible dessert. With its buttery crust, luscious filling, and crunchy topping, it’s a guaranteed showstopper that’ll have everyone asking for seconds.
Give it a try and let us know how it turns out! Don’t forget to leave a comment and tag your sweet creations on Pinterest or Instagram.
Preparation Time: 25 minutes
Cooking Time: 65 minutes
Chilling Time: 4 hours
Cuisine: American
Nutritional Information (Per Slice, serves 12):
Calories: 480 | Protein: 7g | Carbohydrates: 40g | Fat: 32g | Fiber: 2g | Sodium: 290mg

Banana Pudding Crunch Cheesecake
- Total Time: 1 hour 10 minutes
Description
Looking for a comforting, cheesy side dish that everyone will love? These French Onion Funeral Potatoes are the ultimate crowd-pleaser! Creamy, cheesy potatoes are mixed with caramelized onions and topped with a crispy, buttery topping. It’s rich, savory, and perfect for family dinners, potlucks, holidays, or anytime you need a cozy, satisfying dish.
Want recipes like this delivered straight to your inbox? Subscribe now to get the latest culinary creations you’ll love.
Ingredients
For the Potatoes:
-
1 bag (30 oz) frozen shredded hash browns, thawed
-
1 large onion, thinly sliced
-
2 tbsp butter
-
1 can (10.5 oz) cream of mushroom soup
-
1 cup sour cream
-
1 cup shredded mozzarella cheese
-
1 cup shredded cheddar cheese
-
1 packet (1 oz) French onion soup mix
-
½ tsp garlic powder
-
½ tsp salt
-
¼ tsp black pepper
For the Topping:
-
2 cups crispy fried onions (like French’s)
-
2 tbsp melted butter
Optional Garnishes:
-
Fresh chopped parsley
-
Extra shredded cheese
Instructions
Step 1: Caramelize the Onions
Preheat your oven to 350°F (175°C).
In a skillet over medium heat, melt 2 tablespoons of butter.
Add the sliced onions and cook, stirring occasionally, for 15-20 minutes until golden and caramelized.
Set aside.
Step 2: Mix the Potato Base
In a large mixing bowl, combine the cream of mushroom soup, sour cream, mozzarella, cheddar, French onion soup mix, garlic powder, salt, and black pepper.
Stir in the thawed hash browns and caramelized onions until everything is evenly coated.
Step 3: Assemble the Casserole
Spread the potato mixture evenly into a greased 9×13-inch baking dish.
Step 4: Bake the Potatoes
Cover with foil and bake for 35-40 minutes, until hot and bubbling.
Step 5: Add the Crispy Topping
Remove the foil.
In a small bowl, toss the crispy fried onions with 2 tablespoons melted butter.
Sprinkle the buttered onions evenly over the top of the casserole.
Bake uncovered for another 10-15 minutes, until the topping is golden and crispy.
Step 6: Garnish and Serve
Sprinkle with fresh parsley and extra shredded cheese if desired.
Serve hot and enjoy!
Notes
Caramelize the Onions Low and Slow – This brings out their natural sweetness.
Thaw the Hash Browns – Ensures even baking and prevents excess moisture.
Cover While Baking – Helps the casserole cook evenly without drying out.
Add Topping Last – Keeps the fried onions crisp and golden.
Customize It – Stir in cooked beef bacon, diced green onions, or swap cheeses for different flavors.
- Prep Time: 20 minutes
- Cook Time: 50 minutes
- Cuisine: American