Witch Hat Cookies are a delightful way to celebrate Halloween with family and friends. These no-bake treats are not only fun to make but also perfect for parties, school events, or just a cozy night in. With their adorable shape and colorful frosting, these cookies will surely be a hit among kids and adults alike. Let’s dive into this easy-to-follow recipe that brings joy and creativity to your kitchen!
Why You’ll Love This Recipe
- Simple to Make – With just a few quick steps, even the little ones can help create these charming cookies.
- Fun for All Ages – Crafting these cookies is a fantastic activity for families, making memories together in the kitchen.
- Customizable – Use different colors of frosting to match your Halloween theme or personal taste.
- No Baking Required – Perfect for those who want to whip up a sweet treat without turning on the oven.
- Perfect for Parties – These cookies make great additions to any Halloween gathering or festive celebration.
Tools and Preparation
Gathering the right tools will help streamline your cooking process. Here’s what you need:
Essential Kitchen Tools
- Piping bags or sandwich bags
- Baking tray
- Small bowls
- Spatula
Why These Tools Matter
- Piping bags – Ideal for decorating and adding precision to your frosting application.
- Baking tray – Provides a stable surface for arranging your cookies neatly.
- Small bowls – Helpful for mixing and preparing various colors of frosting without mess.
Ingredients
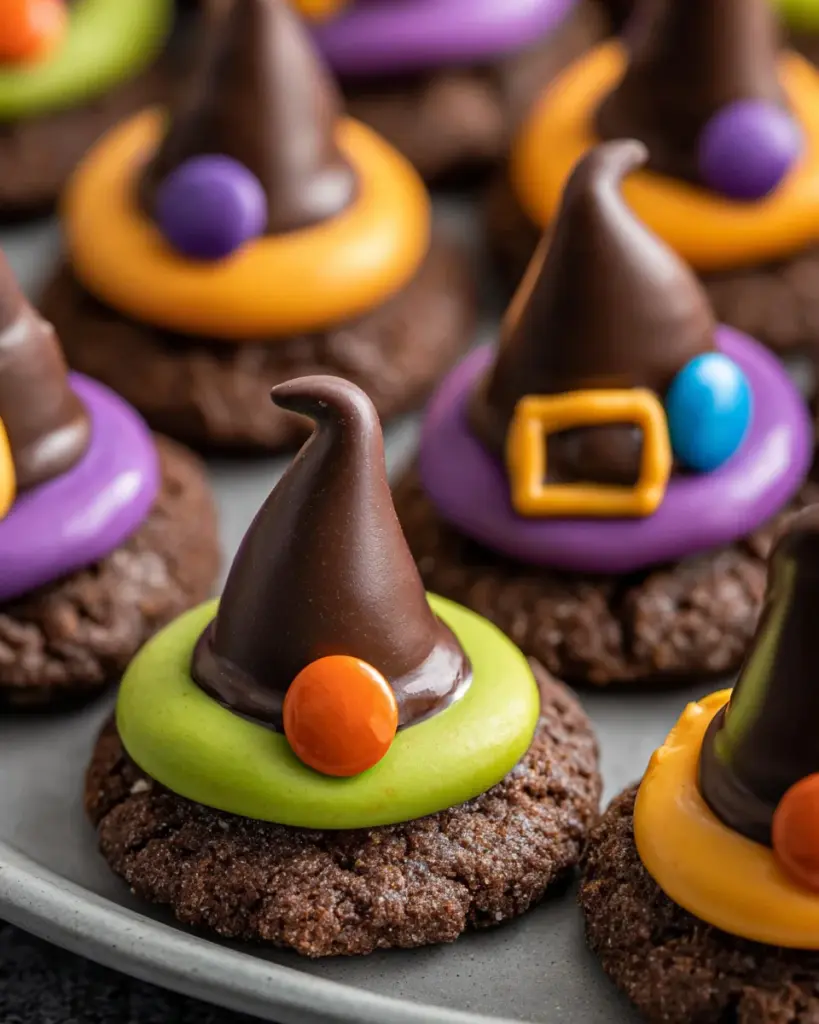
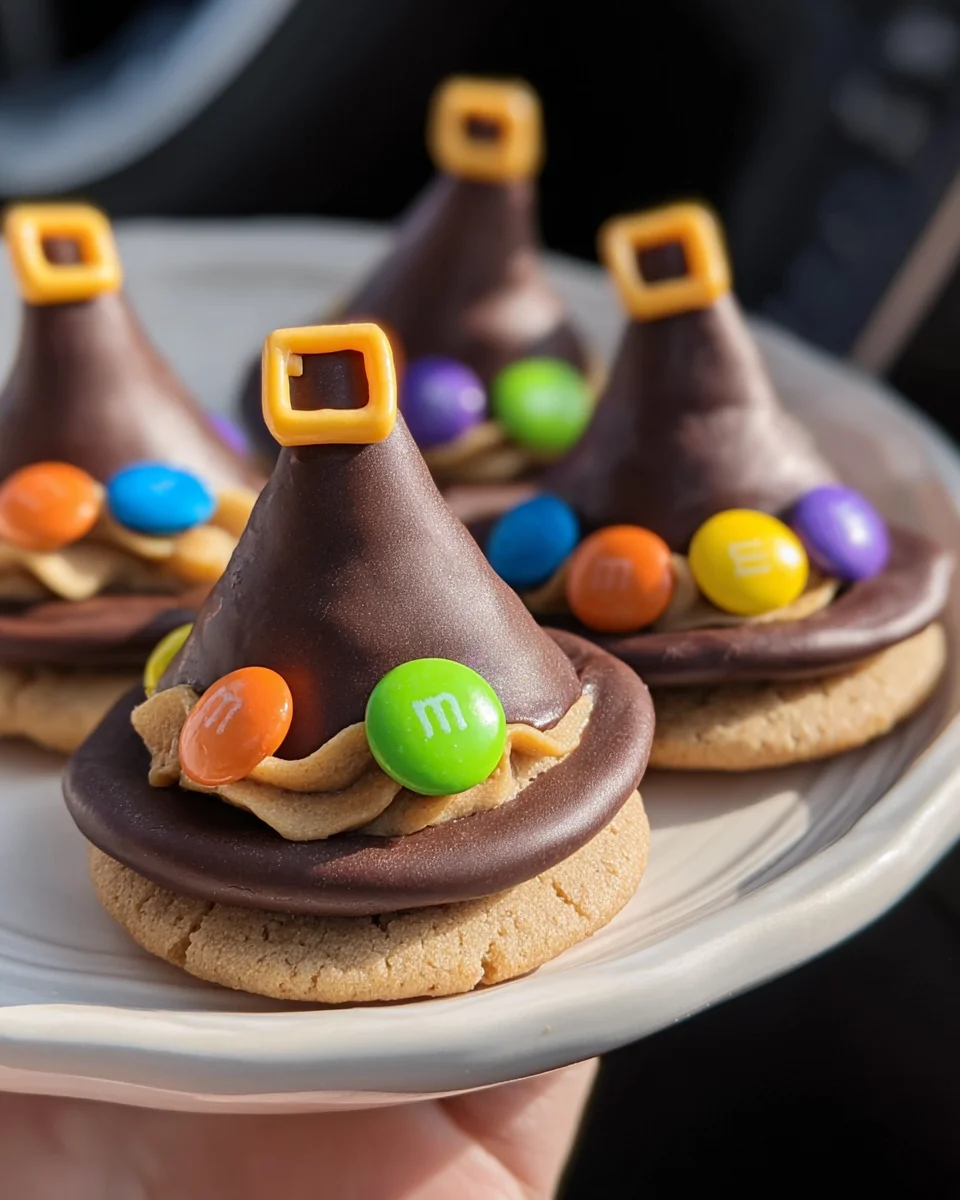
No bake Witch Hat Cookies are a cute, edible Halloween craft to make with kids.
For the Cookies
- 1 packet fudge-covered cookies
- 16 ounce tub of white frosting
- Food coloring
- 18 Chocolate kisses (unwrapped) (1 for each cookie)
- 18 Mini yellow M&Ms (1 for each cookie)
How to Make Witch Hat Cookies
Step 1: Arrange the Cookies
Begin by placing the fudge-covered cookies in a single layer on a baking tray. This will serve as the base for your witch hats.
Step 2: Prepare the Frosting
Divide the white frosting into small bowls—one for each color you wish to use. Add food coloring to achieve your desired shades, mixing well until uniform.
Step 3: Fill the Piping Bags
Transfer each color of frosting into separate piping bags or sandwich bags. Cut off a small corner of each bag.
Step 4: Create the Hat Base
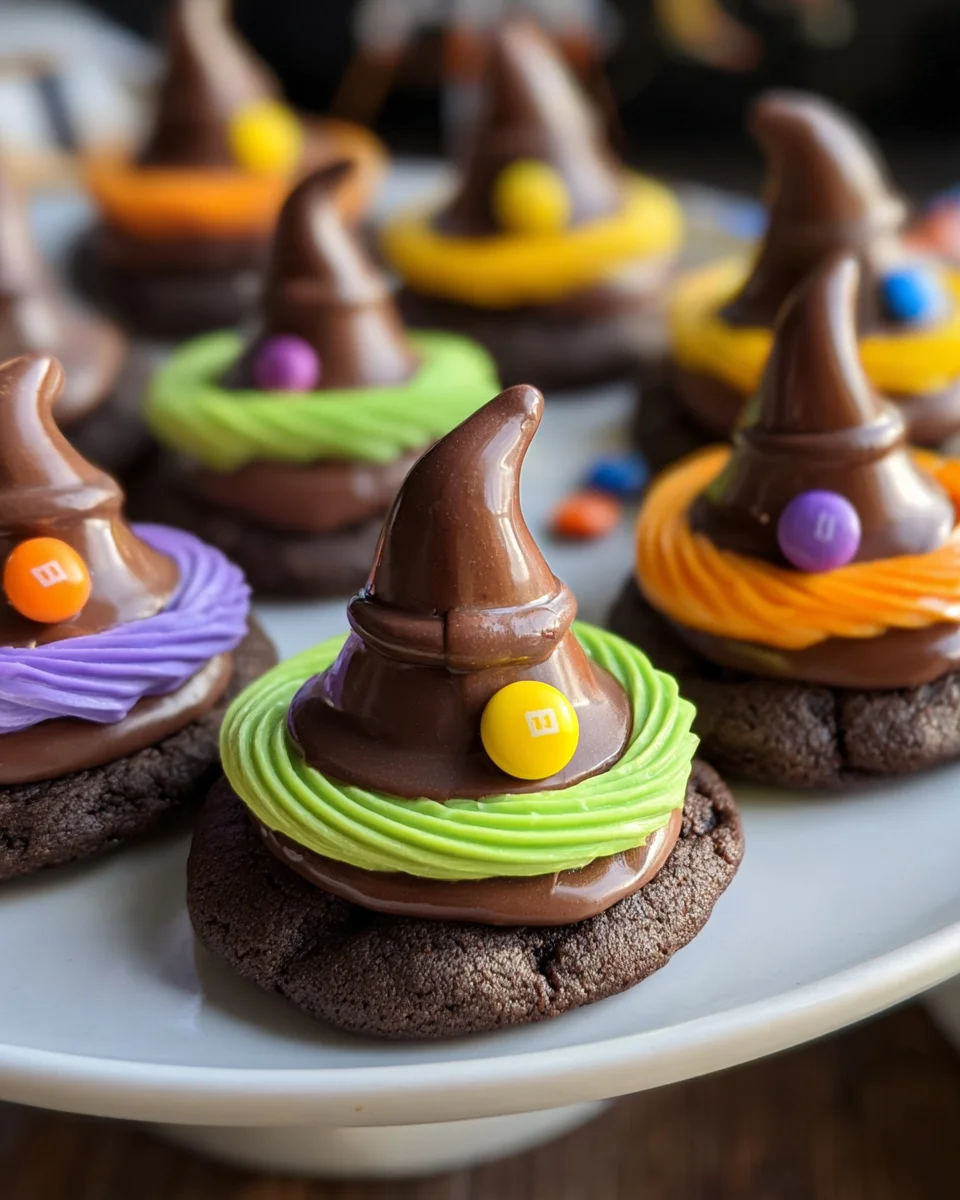
Dollop frosting in the center of each cookie, about the size of a chocolate kiss. This will form the base of your witch hat.
Step 5: Assemble the Hats
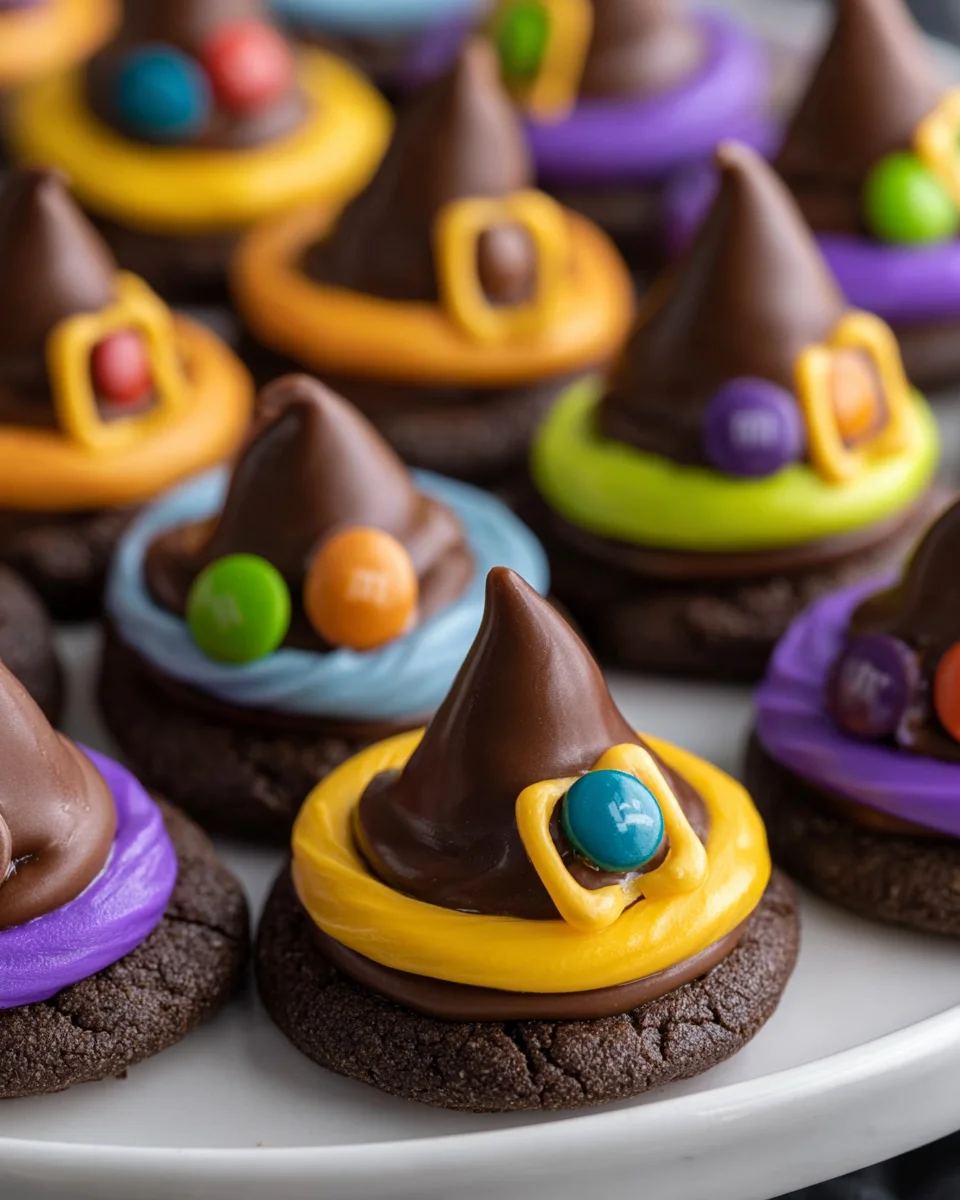
Take one chocolate kiss and gently press it down into the center of the frosting on each cookie. The pressure will cause the frosting to spread out, forming a colorful ring around it.
Step 6: Add Buckles
Top off each cookie by adding one Mini yellow M&M onto the band of frosting, representing a buckle on your witch’s hat.
Step 7: Set and Enjoy!
Allow the decorated cookies to set for about 15-20 minutes before serving. Enjoy these fun Witch Hat Cookies at your next Halloween event!
How to Serve Witch Hat Cookies
Witch Hat Cookies are not just a treat; they’re a fun, festive addition to any Halloween gathering. Whether you’re hosting a party or simply enjoying a spooky movie night, these cookies can be served in various creative ways.
Creative Displays
- Cookie Tower: Stack the cookies in a tiered display for an eye-catching centerpiece.
- Halloween-themed Platter: Arrange the cookies on a platter decorated with faux cobwebs and plastic spiders for added flair.
Fun Pairings
- Milk: A classic pairing that complements the sweetness of the cookies.
- Hot Chocolate: For a cozy treat, serve with warm hot chocolate topped with whipped cream.
Themed Parties
- Halloween Parties: These cookies can be the star of your dessert table at any spooky celebration.
- Kids’ Craft Events: Set up a cookie-decorating station where children can create their own witch hats.
How to Perfect Witch Hat Cookies
Creating perfect Witch Hat Cookies is easy with a few simple tips. Follow these suggestions to ensure your cookies are both delicious and visually appealing.
- Bold Colors: Use vibrant food coloring to make your frosting pop. This will enhance the overall appearance of your cookies.
- Even Distribution: When applying frosting, ensure it’s evenly spread to create a uniform look for all cookies.
- Fresh Ingredients: Use fresh chocolate kisses and M&Ms for the best taste and texture.
- Chill Before Serving: Allow the cookies to chill in the refrigerator for 10 minutes after decorating. This helps the frosting set better.
- Use Piping Bags: For more control over your frosting application, use piping bags instead of standard sandwich bags.
- Personal Touches: Encourage creativity by letting everyone choose their own color combinations and decoration styles.
Best Side Dishes for Witch Hat Cookies
Witch Hat Cookies can be complemented by delightful side dishes that add variety to your Halloween spread. Here are some ideas to consider:
- Pumpkin Soup: A warm and comforting dish that brings seasonal flavors to your table.
- Monster Veggie Platter: An assortment of colorful vegetables arranged like monsters, served with a tasty dip.
- Spooky Fruit Skewers: Assemble fruit pieces on skewers, resembling creepy creatures or ghosts.
- Ghostly Marshmallow Treats: Marshmallows dipped in white chocolate and decorated like friendly ghosts.
- Candy Corn Cupcakes: Sweet cupcakes layered with candy corn colors, perfect for Halloween festivities.
- Witch’s Brew Punch: A colorful non-alcoholic punch made with fruit juices and soda for refreshing enjoyment.
Common Mistakes to Avoid
No bake Witch Hat Cookies are a fun treat, but there are some common pitfalls to watch out for. Here are a few mistakes to help you create the perfect Halloween dessert.
- Bold frosting colors: Not mixing the food coloring well can lead to uneven colors. Make sure to blend thoroughly for a vibrant look.
- Bold cookie arrangement: Overcrowding the cookies on the tray can make decorating difficult. Arrange them with enough space to work around each cookie.
- Bold frosting quantity: Using too little frosting may not hold the chocolate kiss properly. Be generous with your dollops for stability and visual appeal.
- Bold chilling time: Skipping the setting time can result in messy cookies. Let them sit for at least 15-20 minutes to firm up before serving.
- Bold storage conditions: Storing cookies in an airtight container immediately can cause them to lose their crispness. Allow them to cool completely before sealing.
Refrigerator Storage
- Store Witch Hat Cookies in an airtight container.
- They can last up to 5 days in the refrigerator.
Freezing Witch Hat Cookies
- Place cookies in a freezer-safe container, separating layers with parchment paper.
- They can be frozen for up to 3 months.
Reheating Witch Hat Cookies
- Oven: Preheat your oven to 350°F (175°C) and warm the cookies for about 5 minutes on a baking sheet.
- Microwave: Heat cookies individually in 10-15 second intervals until warm.
- Stovetop: Use a non-stick skillet over low heat, warming each cookie for about 1 minute.
Frequently Asked Questions
What are Witch Hat Cookies?
Witch Hat Cookies are no bake treats shaped like witches’ hats, made from fudge-covered cookies and decorated with frosting and chocolate kisses.
How can I customize my Witch Hat Cookies?
You can customize your Witch Hat Cookies by using different colors of frosting or adding sprinkles for extra decoration.
Can I use different types of cookies?
Absolutely! Feel free to experiment with various flavors of cookies; just ensure they have a flat surface for decoration.
How should I store leftover Witch Hat Cookies?
Store any leftovers in an airtight container at room temperature or refrigerate them for longer freshness.
Conclusion
Witch Hat Cookies are not only adorable but also versatile, making them perfect for Halloween festivities. You can customize them with different colors and decorations, ensuring they fit any theme or preference. Give this fun recipe a try and enjoy creating these delightful treats!

Witch Hat Cookies
- Total Time: 20 minutes
- Yield: Makes 18 servings 1x
Description
Witch Hat Cookies are the perfect no-bake Halloween treat that combines fun and creativity in every bite. These delightful cookies are easy to make, making them an excellent activity for families to enjoy together. With a base of fudge-covered cookies topped with colorful frosting and chocolate kisses, they’re not only visually appealing but also a delicious sweet to share at parties or festive gatherings. Whether you’re hosting a spooky movie night or attending a Halloween bash, these cookies will surely impress both kids and adults alike. Let’s dive into this simple recipe that transforms your kitchen into a playful Halloween wonderland!
Ingredients
- 1 packet fudge-covered cookies
- 16 oz tub of white frosting
- Food coloring
- 18 chocolate kisses (unwrapped)
- 18 mini yellow M&Ms
Instructions
- Arrange fudge-covered cookies on a baking tray.
- Divide white frosting into small bowls and mix in food coloring to create desired shades.
- Fill piping bags with colored frosting.
- Add a dollop of frosting to the center of each cookie as the hat base.
- Press a chocolate kiss into the frosting on each cookie.
- Add a mini yellow M&M on top for the buckle.
- Allow cookies to set for 15-20 minutes before serving.
- Prep Time: 20 minutes
- Cook Time: 0 minutes
- Category: Dessert
- Method: No Bake
- Cuisine: American
Nutrition
- Serving Size: 1 cookie (30g)
- Calories: 150
- Sugar: 14g
- Sodium: 75mg
- Fat: 7g
- Saturated Fat: 3g
- Unsaturated Fat: 4g
- Trans Fat: 0g
- Carbohydrates: 21g
- Fiber: 1g
- Protein: 1g
- Cholesterol: 0mg