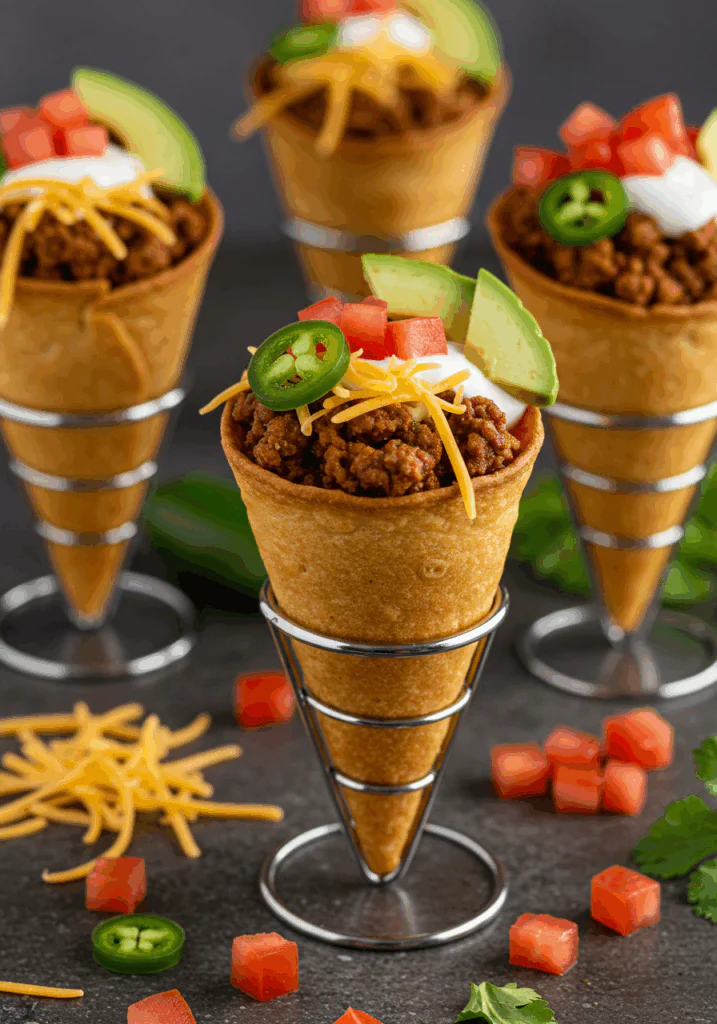
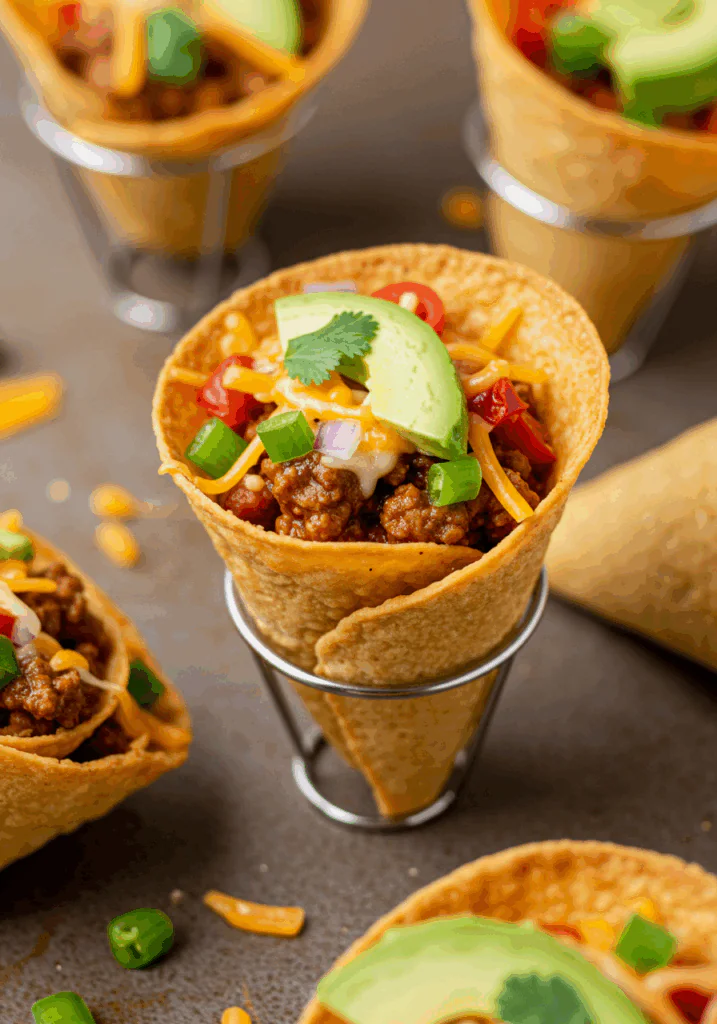
Looking for a fun, kid-friendly, and nutritious twist on taco night? These Healthy Taco Pizza Cones are everything you love about tacos—zesty ground beef, melty cheese, and fresh veggies—all served in a crispy, cone-shaped wrap. Baked to perfection and easy to hold, they’re ideal for parties, meal prepping, or just spicing up your dinner routine.
Want recipes like this delivered straight to your inbox? Subscribe now to get the latest culinary creations you’ll love.
Why You’ll Love This Recipe
Handheld Fun – A playful, mess-free way to enjoy tacos.
Healthier Ingredients – Lean ground beef, whole wheat wraps, and fresh toppings.
Customizable – Great for picky eaters and creative fillings.
Meal-Prep Friendly – Store and reheat for quick lunches or snacks.
Kid-Approved – Perfect for little hands and taco lovers of all ages.
Ingredients You’ll Need
For the Cones:
- 4 whole wheat tortillas (8-inch size)
- Olive oil spray
- Foil or metal cone molds for shaping
For the Taco Filling:
- 1 lb lean ground beef
- 1 tbsp olive oil
- 1 small onion, diced
- 2 cloves garlic, minced
- 1 tbsp taco seasoning
- ¼ tsp smoked paprika
- ½ cup low-sodium tomato sauce or salsa
- Salt and pepper to taste
For the Cheese Layer:
- 1 cup shredded reduced-fat mozzarella or cheddar cheese
For Fresh Toppings:
- 1 cup shredded lettuce
- 1 small tomato, diced
- 1 avocado, diced
- ¼ cup plain Greek yogurt (as a healthy sour cream alternative)
- 2 tbsp chopped fresh cilantro
- Lime wedges (for serving)
Tools You’ll Need
- Skillet
- Mixing spoon or spatula
- Oven and baking sheet
- Aluminum foil or cone molds
- Knife and cutting board
- Small bowls for toppings
Step-by-Step Instructions
Step 1: Preheat the Oven & Shape the Cones
Preheat oven to 375°F (190°C).
Wrap tortillas into a cone shape using foil or mold and secure with a toothpick if needed.
Place cones upright or on their side on a baking sheet.
Lightly spray with olive oil and bake for 10–12 minutes, or until golden and crisp.
Let them cool for a few minutes, then remove molds carefully.
Step 2: Cook the Taco Filling
In a skillet, heat olive oil over medium heat.
Add diced onion and cook for 2–3 minutes until softened.
Add minced garlic and cook for another 30 seconds.
Add ground beef and break it apart with a spoon. Cook until browned and no longer pink.
Stir in taco seasoning, smoked paprika, and tomato sauce.
Simmer for 5 minutes. Season with salt and pepper to taste. Remove from heat.
Step 3: Fill the Cones with Cheese and Meat
Add a spoonful of shredded cheese into the bottom of each cone.
Fill the cones with the warm beef mixture, pressing gently to fill all the way down.
Top with more cheese if desired, then place back in the oven for 2–3 minutes to melt.
Step 4: Add Fresh Toppings
Remove from the oven and top with shredded lettuce, diced tomato, avocado, and a dollop of Greek yogurt.
Sprinkle with chopped cilantro and serve with lime wedges on the side.

Tips for Best Results
Don’t Overfill – Fill tightly but not so full the cones split.
Keep Cones Crisp – Bake just until golden, and fill right before serving to avoid sogginess.
Make it Spicy – Add chopped jalapeños or a drizzle of hot sauce.
Veggie Boost – Add black beans, corn, or sautéed bell peppers to the meat filling.
Use Greek Yogurt – It’s a protein-rich, lighter option that still gives that creamy taco topping vibe.
Serving Suggestions
Mexican Rice – A perfect side to round out your meal.
Corn Salad – Adds crunch and sweetness to balance the spice.
Tortilla Chips with Salsa or Guacamole – A great pairing for party platters.
Fruit Skewers – Add a healthy, refreshing sweet bite.
How to Store & Reheat
Storing:
Refrigerate: Store unfilled cones and meat separately in airtight containers for up to 4 days.
Do not store filled cones to avoid sogginess.
Freezing:
Freeze the cooked beef mixture for up to 2 months. Thaw in the fridge before reheating.
Reheating:
Oven: Reheat cones at 325°F for 5–7 minutes.
Microwave: Reheat the beef mixture separately and fill cones fresh.
Frequently Asked Questions
1. Can I use ground turkey or chicken?
Yes! Lean turkey or chicken are excellent lower-fat options.
2. What tortillas are best?
Whole wheat tortillas work well, but you can also use spinach, tomato, or low-carb wraps.
3. Can I make this vegetarian?
Absolutely! Substitute the meat with black beans, lentils, or a plant-based crumble.
4. Are these cones good for kids?
Yes, they’re fun, handheld, and easy for little ones to eat.
5. Can I prep them ahead for a party?
Yes! Bake the cones ahead and store them in an airtight container. Reheat slightly before filling and serving.
Final Thoughts
These Healthy Taco Pizza Cones are a game-changer for taco night. With crispy shells, savory filling, and colorful toppings, they bring the fun to your table while keeping things nutritious and satisfying. Great for gatherings, lunchboxes, or even a casual dinner, they’ll quickly become a family favorite.
Try them tonight and let me know what your crew thinks! Snap a pic, tag your creation, and don’t forget to leave a review below.
Preparation Time: 15 minutes
Cooking Time: 20 minutes
Cuisine: Mexican-American Fusion
Nutritional Information (Per Cone):
Calories: 260 | Protein: 18g | Carbohydrates: 16g | Fat: 14g | Fiber: 4g | Sodium: 390mg

Healthy Taco Pizza Cones
- Total Time: 35 minutes
Description
Looking for a fun, kid-friendly, and nutritious twist on taco night? These Healthy Taco Pizza Cones are everything you love about tacos—zesty ground beef, melty cheese, and fresh veggies—all served in a crispy, cone-shaped wrap. Baked to perfection and easy to hold, they’re ideal for parties, meal prepping, or just spicing up your dinner routine.
Want recipes like this delivered straight to your inbox? Subscribe now to get the latest culinary creations you’ll love.
Ingredients
For the Cones:
-
4 whole wheat tortillas (8-inch size)
-
Olive oil spray
-
Foil or metal cone molds for shaping
For the Taco Filling:
-
1 lb lean ground beef
-
1 tbsp olive oil
-
1 small onion, diced
-
2 cloves garlic, minced
-
1 tbsp taco seasoning
-
¼ tsp smoked paprika
-
½ cup low-sodium tomato sauce or salsa
-
Salt and pepper to taste
For the Cheese Layer:
-
1 cup shredded reduced-fat mozzarella or cheddar cheese
For Fresh Toppings:
-
1 cup shredded lettuce
-
1 small tomato, diced
-
1 avocado, diced
-
¼ cup plain Greek yogurt (as a healthy sour cream alternative)
-
2 tbsp chopped fresh cilantro
-
Lime wedges (for serving)
Instructions
Step 1: Preheat the Oven & Shape the Cones
Preheat oven to 375°F (190°C).
Wrap tortillas into a cone shape using foil or mold and secure with a toothpick if needed.
Place cones upright or on their side on a baking sheet.
Lightly spray with olive oil and bake for 10–12 minutes, or until golden and crisp.
Let them cool for a few minutes, then remove molds carefully.
Step 2: Cook the Taco Filling
In a skillet, heat olive oil over medium heat.
Add diced onion and cook for 2–3 minutes until softened.
Add minced garlic and cook for another 30 seconds.
Add ground beef and break it apart with a spoon. Cook until browned and no longer pink.
Stir in taco seasoning, smoked paprika, and tomato sauce.
Simmer for 5 minutes. Season with salt and pepper to taste. Remove from heat.
Step 3: Fill the Cones with Cheese and Meat
Add a spoonful of shredded cheese into the bottom of each cone.
Fill the cones with the warm beef mixture, pressing gently to fill all the way down.
Top with more cheese if desired, then place back in the oven for 2–3 minutes to melt.
Step 4: Add Fresh Toppings
Remove from the oven and top with shredded lettuce, diced tomato, avocado, and a dollop of Greek yogurt.
Sprinkle with chopped cilantro and serve with lime wedges on the side.
Notes
Don’t Overfill – Fill tightly but not so full the cones split.
Keep Cones Crisp – Bake just until golden, and fill right before serving to avoid sogginess.
Make it Spicy – Add chopped jalapeños or a drizzle of hot sauce.
Veggie Boost – Add black beans, corn, or sautéed bell peppers to the meat filling.
Use Greek Yogurt – It’s a protein-rich, lighter option that still gives that creamy taco topping vibe.
- Prep Time: 15 minutes
- Cook Time: 20 minutes
- Cuisine: Mexican-American Fusion


